
Welcome to the Fluke 179 Multimeter Manual, your comprehensive guide to understanding and utilizing this advanced True-RMS digital multimeter. Designed for professionals and enthusiasts alike, this manual provides detailed instructions for installation, operation, and maintenance, ensuring you unlock the full potential of your device.
Overview of the Fluke 179 Multimeter
The Fluke 179 is a high-precision, battery-powered True-RMS digital multimeter designed for accurate measurements. It features a 6000-count, 3 3/4-digit display with manual and automatic ranging. This versatile tool measures voltage, current, resistance, frequency, and more, with a bar graph for real-time signal analysis. Part of the 170 Series, it shares consistent performance with models 175 and 177, ensuring reliability and durability for professionals and enthusiasts alike.
Key Features and Specifications
The Fluke 179 multimeter offers True-RMS voltage and current measurements, 6000-count resolution, and both manual and automatic ranging for precision. It includes a bar graph for visual signal analysis and measures frequency, resistance, diodes, and continuity. With a 3 3/4-digit display, it supports temperature measurements using a thermocouple. Its battery-powered design ensures portability, while its durable construction and lifetime warranty guarantee long-term reliability for professional and industrial use.
Safety Precautions and Guidelines
Always follow safety guidelines to prevent damage or injury. Ensure proper use as per the manual, avoid unauthorized modifications, and handle electrical measurements with care for optimal safety.
General Safety Information
Always adhere to safety guidelines to ensure safe operation and prevent potential hazards. Read the manual thoroughly before use, and avoid unauthorized modifications to maintain compliance with safety standards.
Handle electrical measurements with care, ensuring proper insulation and avoiding overloading. Regularly inspect the multimeter and leads for damage. Follow all precautions to safeguard both the device and the user.
Specific Safety Tips for Operation
Avoid using the multimeter on damaged or malfunctioning equipment to prevent unexpected hazards. Always ensure the multimeter is set to the correct range for the measurement being taken, as improper settings can lead to inaccurate readings or device damage.
Never exceed the maximum voltage or current ratings specified in the manual. Use the provided test leads correctly, avoiding improvisation, to maintain safety and measurement accuracy during operation.

Installation and Setup
Welcome to the installation and setup section of the Fluke 179 Multimeter Manual. This guide will walk you through unpacking, initial inspection, battery installation, and understanding the display and controls to ensure proper setup for optimal performance.
Unpacking and Initial Inspection
Begin by carefully unpacking the Fluke 179 Multimeter and its accessories. Inspect the device for any visible damage or defects. Verify the inclusion of the multimeter, test leads, 9V battery, thermocouple, user manual, and protective case. Ensure all components are in excellent condition. Perform a quick functional test to confirm proper operation before proceeding with further setup or use.
Battery Installation and Management
To install the battery, locate the battery compartment on the rear of the Fluke 179 Multimeter. Insert the provided 9V battery, ensuring correct polarity as indicated by the labels. Secure the compartment tightly to avoid movement; For optimal performance, use high-quality batteries and replace them when the low-battery indicator appears. Proper battery management ensures accurate measurements and prolongs the multimeter’s operational life.
Understanding the Display and Controls
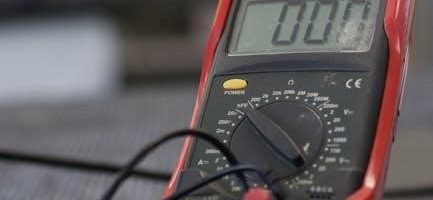
The Fluke 179 Multimeter features a 6000-count, 3 3/4-digit display with a bar graph for real-time measurement trends. The display segments indicate units, modes, and warnings. The rotary switch allows selection of measurement functions and ranges. Dedicated buttons enable autorange, hold, and backlit display. Familiarize yourself with these controls to navigate effortlessly and optimize your measurement experience with the Fluke 179.

Operating Instructions
This section provides step-by-step guidance on operating the Fluke 179, including selecting modes, using the rotary switch, and interpreting measurements for precise results.
Navigating the Multimeter Interface
The Fluke 179 features an intuitive interface with a 3 3/4-digit display and a bar graph for real-time measurements. Use the rotary switch to select modes such as voltage, current, or resistance. The interface includes function and range buttons for precise control. The clear display ensures easy reading of measurements, while the bar graph provides visual feedback for dynamic changes, enhancing operational efficiency and accuracy.
Manual Ranging vs. Autoranging
The Fluke 179 offers Manual Ranging and Autoranging modes for flexible measurements. Autoranging automatically selects the best range, saving time. Manual Ranging allows users to set specific ranges, useful for precise measurements. Both modes ensure accuracy, with Autoranging optimizing speed and Manual Ranging providing control for known value ranges, enhancing versatility in various testing scenarios.
Basic Measurement Techniques
Mastering basic measurement techniques with the Fluke 179 ensures accurate and safe testing. For voltage and current, select the correct range and connect probes properly. Resistance measurements require a stable circuit, while continuity tests use a built-in buzzer. Diode tests verify forward and reverse bias. Always ensure the multimeter is set to the correct mode and probes are securely connected to avoid errors and ensure reliable results.

Advanced Measurement Modes
The Fluke 179 supports advanced modes like frequency measurement up to 1 kHz and a bar graph for visual signal analysis, enhancing diagnostic capabilities for complex scenarios.
Voltage and Current Measurements
The Fluke 179 multimeter provides accurate True-RMS voltage and current measurements, ensuring reliable readings in both AC and DC modes. With a 6000-count resolution, it delivers precise results. The device supports a wide range of voltage and current measurement capabilities, making it versatile for various applications. The bar graph feature enhances visual analysis, allowing users to monitor signal trends effectively. This ensures accurate and efficient diagnostic procedures in the field or lab.
Resistance, Diode Test, and Continuity Test
The Fluke 179 multimeter offers precise resistance measurements with its 6000-count resolution. It also includes a diode test function to verify semiconductor integrity and a continuity test with an audible alert for quick circuit checks. These features, combined with automatic ranging, ensure efficient troubleshooting and accurate results in various electrical applications, making it an essential tool for professionals and technicians.
Frequency Measurement
The Fluke 179 multimeter accurately measures frequency up to 1 kHz, providing precise readings for AC voltage and current. In manual range mode, the bar graph displays measurements accurately within this range. This feature is essential for troubleshooting electrical systems, ensuring accurate frequency detection in various industrial and electronic applications, making it a versatile tool for professionals and technicians alike.

Maintenance and Troubleshooting
Regular maintenance ensures optimal performance and longevity of the Fluke 179 multimeter. This section provides troubleshooting techniques and solutions to common issues, helping you resolve problems efficiently.
Cleaning and Calibrating the Multimeter
Regular cleaning and calibration are essential for maintaining the accuracy and reliability of your Fluke 179 multimeter. Use a soft, dry brush or cloth to remove dust and debris from the exterior and terminals. Avoid using liquids or abrasive materials that could damage the device. Calibration should be performed by authorized professionals or according to the manufacturer’s guidelines to ensure precise measurements. Reference the service information section for detailed calibration procedures.
Common Issues and Solutions
Common issues with the Fluke 179 include inaccurate readings or faulty display. Ensure proper calibration and battery maintenance. For incorrect measurements, check input selection and range settings. If the multimeter fails to power on, verify battery installation and connections. Consult the troubleshooting guide for detailed solutions. Regular cleaning of terminals and updating firmware can prevent operational issues. Contact Fluke support for persistent problems beyond basic troubleshooting.
Advanced Troubleshooting Techniques
For complex issues, perform a firmware update or reset the multimeter to factory settings. Check internal circuitry for damage and ensure all connections are secure. Use diagnostic tools to verify sensor accuracy. Consult the manual’s service information for advanced repair procedures. If unresolved, contact Fluke’s expert support team for professional assistance. Always follow safety guidelines during troubleshooting to avoid further damage.

Accessories and Optional Equipment
The Fluke 179 includes test leads, a 9V battery, thermocouple, and protective holster. Optional accessories like calibration kits and additional test lead sets enhance functionality and durability.
Included Accessories
The Fluke 179 multimeter comes with essential accessories to ensure optimal performance. These include high-quality test leads with 4mm probes, a 9V battery for power, a thermocouple for temperature measurements, a detailed user manual, and a protective holster for safe storage and transport. These items are carefully designed to complement the multimeter’s functionality and durability, providing a complete solution for professionals and enthusiasts alike.
Optional Accessories for Enhanced Functionality
Enhance your Fluke 179 multimeter’s capabilities with optional accessories. These include specialized test probes, additional thermocouples, and carrying cases for convenience. Fluke also offers software solutions for data logging and analysis, enabling advanced functionality. These accessories are designed to meet specific workplace demands, ensuring versatility and efficiency in various measurement scenarios. They are recommended for users seeking to expand the multimeter’s utility and performance in professional settings.
Warranty and Support Information
Fluke offers a lifetime limited warranty for the 179 multimeter, ensuring defect-free performance. For support, contact Fluke at 1-888-99-FLUKE or visit their official website for assistance.
Manufacturer’s Warranty Details
Fluke guarantees the 179 multimeter against defects in material and workmanship for its entire lifespan. This warranty ensures your device remains reliable and accurate, covering repairs or replacements needed due to manufacturing flaws. The commitment underscores Fluke’s dedication to quality and customer satisfaction, providing users with peace of mind and protection for their investment in the 179 multimeter.
Contacting Fluke Customer Support
For assistance with your Fluke 179 multimeter, contact Fluke’s customer support at 1-888-99-FLUKE (1-888-993-5853) in the USA. Additionally, visit their official website or consult the manual for more support options, ensuring quick resolution to any inquiries or issues you may encounter while using your device.