
The Kenmore Dryer Model 110 Repair Manual PDF is a comprehensive guide designed for DIY enthusiasts and professionals. It provides detailed troubleshooting, repair procedures, and safety guidelines for maintaining and fixing your Kenmore 110 dryer. This manual ensures you can address common issues efficiently, extending the appliance’s lifespan while ensuring optimal performance. Perfect for those seeking to save money on professional repairs, it offers clear instructions and diagrams to help you get started with confidence.
1.1 Overview of the Kenmore 110 Dryer Model
The Kenmore 110 dryer model is a reliable, 27-inch wide electric dryer designed for efficient fabric care. Known for its durability and performance, it offers multiple heat settings and a spacious drum capacity. Popular among homeowners, it is built by Whirlpool, ensuring high-quality construction and long-lasting reliability for everyday laundry needs.
1.2 Importance of the Repair Manual for DIY Repairs
The repair manual is essential for DIY repairs of the Kenmore 110 dryer. It offers step-by-step instructions, wiring diagrams, and troubleshooting tips, enabling users to identify and fix issues confidently. By following the manual, homeowners can save money on professional services and ensure repairs are done safely and effectively, extending the dryer’s lifespan and maintaining its performance.

Where to Download the Kenmore 110 Dryer Repair Manual PDF
The Kenmore 110 Dryer Repair Manual PDF is available for free download on Sears Parts Direct and ManualsLib. These reliable sources provide access to detailed repair guides, including models like 110.68422700, ensuring you can troubleshoot and fix issues efficiently.
2.1 Official Sears Parts Direct Website
The official Sears Parts Direct website offers authentic Kenmore 110 dryer repair manuals for free; Models like 110.68422700 are readily available, ensuring access to detailed repair guides, part diagrams, and troubleshooting instructions. Users can search by model number, making it easy to find the exact manual needed for their specific Kenmore dryer, ensuring accurate repairs and maintenance.
2.2 ManualsLib and Other Reliable Sources
ManualsLib offers free access to Kenmore 110 dryer manuals in PDF format, including models like 110.75132410 and 110.65132410. This platform provides comprehensive guides, use and care instructions, and troubleshooting tips. Users can download or view these manuals online, making it a reliable alternative to official sources for repairing and maintaining their Kenmore 110 dryer efficiently.
2.3 Ensuring You Download the Correct Model (110 Series)
Verify your Kenmore dryer’s model number, located on the unit, to ensure compatibility. Models starting with 110 indicate Whirlpool-built dryers, while 417 models are Frigidaire-built, requiring different manuals. Cross-check the model number on Sears Parts Direct or ManualsLib to download the correct 110 series manual, avoiding mismatches that could lead to incorrect repair instructions.
Contents of the Kenmore 110 Dryer Repair Manual
The Kenmore 110 Dryer Repair Manual includes installation guides, operation tips, troubleshooting for common issues, step-by-step repair instructions, wiring diagrams, and essential maintenance advice for optimal performance;
3.1 Installation and Operation Instructions
The manual provides detailed installation and operation instructions for the Kenmore 110 dryer, ensuring proper setup and usage. It includes step-by-step guidance for installing the dryer, connecting electrical and venting systems, and operating controls. Tips for efficient drying cycles and model-specific considerations are also highlighted to ensure safe and optimal performance, helping you avoid common mistakes and extend the appliance’s lifespan.
3.2 Troubleshooting Common Issues
The manual includes a dedicated section for troubleshooting common problems with the Kenmore 110 dryer, such as no heat, poor performance, or unusual noises; It provides step-by-step diagnostic steps and solutions, helping users identify and fix issues efficiently. Detailed wiring diagrams and error code explanations are also included to assist in pinpointing the root cause of any malfunction, ensuring effective repairs and minimizing downtime.
3.3 Detailed Repair Procedures
The manual provides in-depth repair procedures for various components, including the heating element, motor, and belt replacements. Step-by-step instructions guide users through disassembly, part inspection, and reassembly. Detailed diagrams and exploded views help visualize complex repairs, ensuring accuracy and safety. This section is essential for addressing both minor and major issues effectively, with clear instructions for DIY enthusiasts and professionals alike. Tools and materials needed are also listed for convenience.
3.4 Wiring Diagrams and Component Access
The manual includes detailed wiring diagrams to help identify electrical connections and components. These diagrams provide a visual guide for diagnosing issues and accessing internal parts. Clear labels and exploded views simplify locating elements like sensors, switches, and motors. This section is invaluable for safely navigating complex electrical systems and ensuring accurate repairs.
Common Problems and Solutions
This section outlines common issues with the Kenmore 110 dryer, such as heating problems, power failures, and unusual noises. It offers practical solutions and repair tips to address these issues effectively, ensuring your dryer operates smoothly and efficiently. Refer to the manual for detailed troubleshooting and fixes.
4.1 Dryer Not Heating: Possible Causes and Fixes
If your Kenmore 110 dryer isn’t heating, common causes include a faulty heating element, broken thermostat, or clogged venting system. Ensure the power supply is stable and check for tripped circuit breakers. Clean lint buildup from vents and ducts, as blockages can prevent proper heating. Replace damaged heating elements or thermostats, and always unplug the dryer before attempting repairs for safety.
4.2 Dryer Not Turning On: Electrical and Mechanical Issues
If your Kenmore 110 dryer won’t turn on, check the power supply and circuit breaker. Ensure the outlet is functioning and the dryer is properly plugged in. Inspect the door switch, start switch, and belt for damage. A faulty thermal fuse or broken drum belt could also prevent operation. Always unplug the dryer before performing repairs.
4.3 Strange Noises: Identifying and Replacing Faulty Parts
Strange noises from your Kenmore 110 dryer may indicate worn or damaged components. Common culprits include a malfunctioning drum bearing, a failing belt pulley, or a broken drum support roller. To diagnose, inspect these parts for wear or damage. Replace faulty components with genuine Kenmore parts to restore quiet operation and prevent further damage. Always unplug the dryer before starting repairs.

Safety Precautions for Repairing Your Kenmore 110 Dryer
Always disconnect power before repairs. Use proper tools and protective gear to avoid injury. Be cautious with electrical components to prevent shocks or fires. Ensure all safety guidelines in the manual are followed to protect yourself and maintain appliance integrity.
5.1 Understanding Electrical Safety
Understanding electrical safety is crucial when repairing your Kenmore 110 dryer. Always disconnect the power supply before starting any repair to avoid electrical shocks. Use a multimeter to ensure no live circuits are present. Never work near water or in damp conditions. Wear insulated gloves and use approved tools to handle electrical components safely. Grounding and proper insulation are essential to prevent accidents.
5.2 Proper Use of Tools and Protective Gear
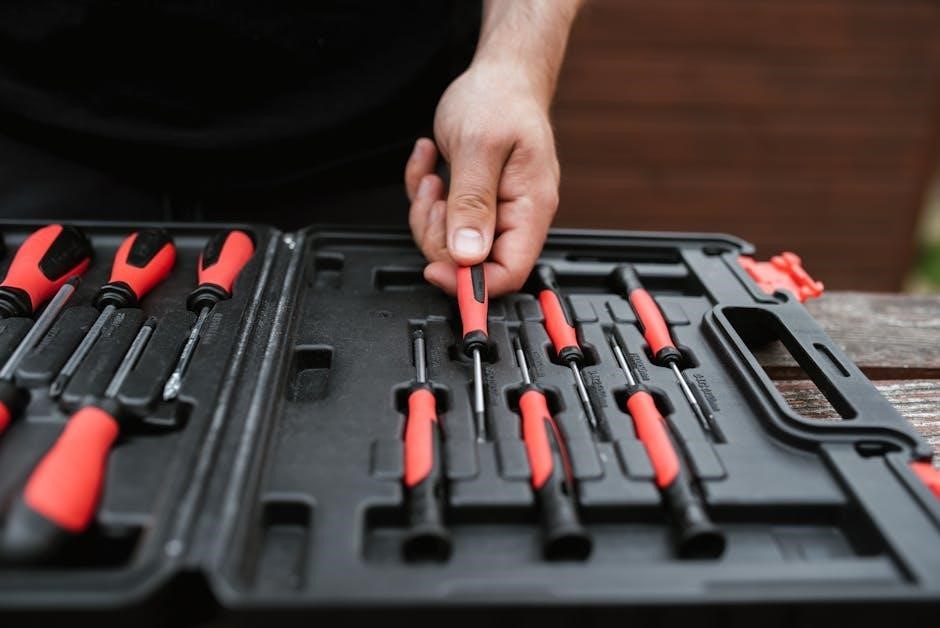
Proper use of tools like screwdrivers, pliers, and wrenches is essential for Kenmore 110 dryer repairs. Always use the correct tool for the task to avoid damaging components. Wear safety glasses to protect your eyes from debris and gloves to prevent cuts and abrasions. Ensure tools are in good condition, and use a dust mask when handling lint or dusty parts.
5.3 Avoiding Fatal Electrical Shock Risks
Always disconnect the dryer from power before starting repairs to avoid electrical shock. Use a multimeter to ensure no voltage is present. Never touch internal components while the dryer is plugged in. Be cautious of high-voltage parts like the heating element and capacitor, which can store charges. Avoid working in damp conditions and ensure proper grounding for safety.
Step-by-Step Repair Guide
Unplug the dryer, diagnose the issue using the manual’s troubleshooting section, and disassemble safely. Replace faulty parts, refer to wiring diagrams, and reassemble carefully. Test the dryer to ensure proper function after repairs.
6.1 Diagnosing the Issue
Begin by identifying symptoms like no heat, unusual noises, or failure to start. Consult the manual’s troubleshooting section to narrow down potential causes. Check electrical connections, thermostat settings, and component functionality. Use diagnostic tools like multimeters to test heating elements or sensors. Always unplug the dryer before starting diagnostics to ensure safety. This step is crucial for effective repairs.
6.2 Disassembling the Dryer Safely
Start by unplugging the dryer to eliminate electrical risks. Remove the top and front panels using a screwdriver, taking care not to damage internal components. Disconnect wiring harnesses and mark them for easy reconnection later. Place screws in a safe container to avoid losing them. Work methodically to maintain access to internal parts without causing further damage.
6.3 Replacing Damaged or Worn-Out Parts
Identify the faulty component using the manual’s parts list. Ensure the dryer is unplugged before starting. Remove the damaged part by detaching screws or clips. Install the new part securely, following the manual’s instructions. Tighten all connections properly and double-check for stability. Replace any additional worn-out components to prevent future issues and ensure optimal performance.
6.4 Reassembling and Testing the Dryer
Reassemble the dryer by reversing the disassembly steps, ensuring all parts are securely fastened. Plug in the dryer and test all functions, including heat, rotation, and controls. Verify that all repairs have resolved the issue. Refer to the manual for specific testing procedures to ensure proper operation and safety. Run a test cycle to confirm everything works smoothly.
Maintenance Tips to Prevent Future Repairs
Regularly clean the venting system, check and replace the dryer belt, and lubricate moving parts to ensure optimal performance and prevent future breakdowns.
7.1 Regular Cleaning of the Venting System
Regularly cleaning the venting system is crucial for maintaining your Kenmore 110 dryer’s efficiency and safety. Clear blockages to prevent overheating and reduce fire risks. Use a vacuum or brush to remove lint and debris annually. This simple maintenance step can improve drying performance and lower energy bills significantly over time.
7.2 Checking and Replacing the Belt
Inspect the dryer belt regularly for cracks, fraying, or wear. A damaged belt can cause the drum to stop turning, leading to poor drying performance. Replace the belt immediately if you notice any signs of damage. Refer to the manual for guidance on removal and installation. Use genuine Kenmore parts for reliability and safety.
7.3 Lubricating Moving Parts
Lubricate the dryer’s moving parts, such as rollers and pulleys, to ensure smooth operation and reduce noise. Use a high-quality, silicone-based lubricant to prevent wear and tear. Regular lubrication helps maintain efficiency and extends the lifespan of your Kenmore 110 dryer. Always unplug the dryer before performing any maintenance to ensure safety.

Additional Resources for Kenmore 110 Dryer Repair
Explore video tutorials, community forums, and expert advice for additional guidance. Sears Customer Support and online repair forums offer valuable insights and troubleshooting tips for your Kenmore 110 dryer.
8.1 Video Tutorials and Guides
Video tutorials provide step-by-step visual guidance for repairing your Kenmore 110 dryer. Platforms like YouTube and repair websites offer detailed demonstrations, covering common fixes like replacing the heating element or belt. These resources complement the manual, offering hands-on examples that make complex repairs more manageable for DIY enthusiasts. They are invaluable for understanding intricate procedures without reading lengthy instructions.
8.2 Community Forums and Expert Advice
Community forums and expert advice offer valuable insights and solutions for repairing your Kenmore 110 dryer. Websites like Sears Parts Direct and DIY repair communities provide troubleshooting tips, repair experiences, and expert recommendations. These resources help clarify complex procedures and offer practical advice from experienced technicians and DIY enthusiasts, ensuring you can address issues confidently and effectively.
8;3 Contacting Sears Customer Support
Contacting Sears Customer Support provides direct assistance for your Kenmore 110 dryer repair needs. Visit their official website or call their support hotline to access troubleshooting guidance, repair advice, or additional resources. Ensure you have your dryer’s model and serial numbers ready for accurate support, helping you resolve issues efficiently and effectively with professional assistance.
Understanding the Manual’s Structure
The Kenmore 110 dryer repair manual is structured to guide users through installation, operation, troubleshooting, and repair. It includes detailed diagrams, parts lists, and clear instructions for easy navigation and comprehension, ensuring users can efficiently locate and address specific issues within the document.
9.1 Navigating the Table of Contents
The Kenmore 110 dryer repair manual begins with a detailed table of contents, organizing sections like installation, troubleshooting, and repair procedures. Each section is further divided into subsections, making it easy to locate specific information. Numbered pages and clear headings ensure quick access to diagrams, parts lists, and instructions, streamlining the repair process for users.
9.2 Interpreting Schematic Diagrams
The Kenmore 110 dryer repair manual includes detailed schematic diagrams to help users understand electrical connections and component layouts. These diagrams are labeled with symbols and descriptions, making it easier to identify parts and their functions. By referencing these visuals, users can trace wiring, locate components, and diagnose issues effectively, ensuring accurate and safe repairs.
9.3 Using the Parts List for Replacement
The Kenmore 110 repair manual includes a detailed parts list, enabling users to identify and purchase the correct components for their dryer. Each part is listed with its description, number, and location, ensuring accurate replacements. This section helps users avoid mismatches and ensures they have everything needed for successful repairs, streamlining the process efficiently.
FAQ About the Kenmore 110 Dryer Repair Manual
Frequently asked questions address topics like downloading the manual for free, printing options, and model coverage. This section clarifies common queries, ensuring users understand the manual’s scope and usage.
10.1 Is the Manual Free to Download?
The Kenmore 110 dryer repair manual is available for free download from various sources like ManualsLib and Sears Parts Direct. Ensure you select the correct model to access the appropriate guide without incurring costs, making DIY repairs more accessible and budget-friendly for homeowners.
10.2 Can I Print the PDF Manual?
Yes, once downloaded, you can print the Kenmore 110 dryer repair manual PDF for easy reference. Printing allows you to have a physical copy, making it convenient for DIY repairs. Ensure your printer settings are correct to maintain the document’s clarity and readability for optimal use during your repair projects.
10.3 Are All Models Covered in the Same Manual?
No, the Kenmore 110 dryer repair manual is specific to models starting with 110, which are Whirlpool-built. Models beginning with 417 are Frigidaire-built and require a different manual. Always verify your model number to ensure you download the correct manual for accurate repair instructions and compatibility.